

Have you ever wondered why professional makeup always looks so perfectly structured and defined? A high-quality cream contour stick offers a precise method for defining facial features through strategic shadow application. Makeup artists rely on these tools for face sculpting to define jawlines and alter visual proportions. Modern formulations place this professional makeup contouring technique directly into the hands of everyday consumers across the United States.
Understanding facial anatomy is the first critical step in mastering a professional cream contour stick. This product creates an optical illusion by absorbing light, making specific facial areas recede visually for a slimmer look. Apply these darker pigments where natural shadows fall, such as beneath the cheekbones and along the temples.
This technique differs significantly from bronzing, which adds warmth and mimics sun exposure to the high points of the face. A proper contour stick features cool or neutral undertones to replicate authentic shadows accurately rather than adding warmth. Applying a warm bronzer as a contour often results in an unnatural appearance that fails to sculpt bone structure effectively.
Recent consumer data shows a massive shift from powder palettes to user-friendly stick formulations for daily makeup routines. According to McKinsey’s State of Fashion Beauty report, cream makeup sales have surged dramatically over the past three years. Consumers prefer the blendability of a cream contour stick for daily wear compared to heavy, traditional theatrical makeup.
- Contour sticks create optical illusions by mimicking natural facial shadows.
- True contour shades require cool or neutral undertones, unlike warm bronzers.
- Cream stick formulations offer superior blendability for everyday consumer use.
Choosing the Best Contour Stick: Selecting the Proper Shade and Undertone
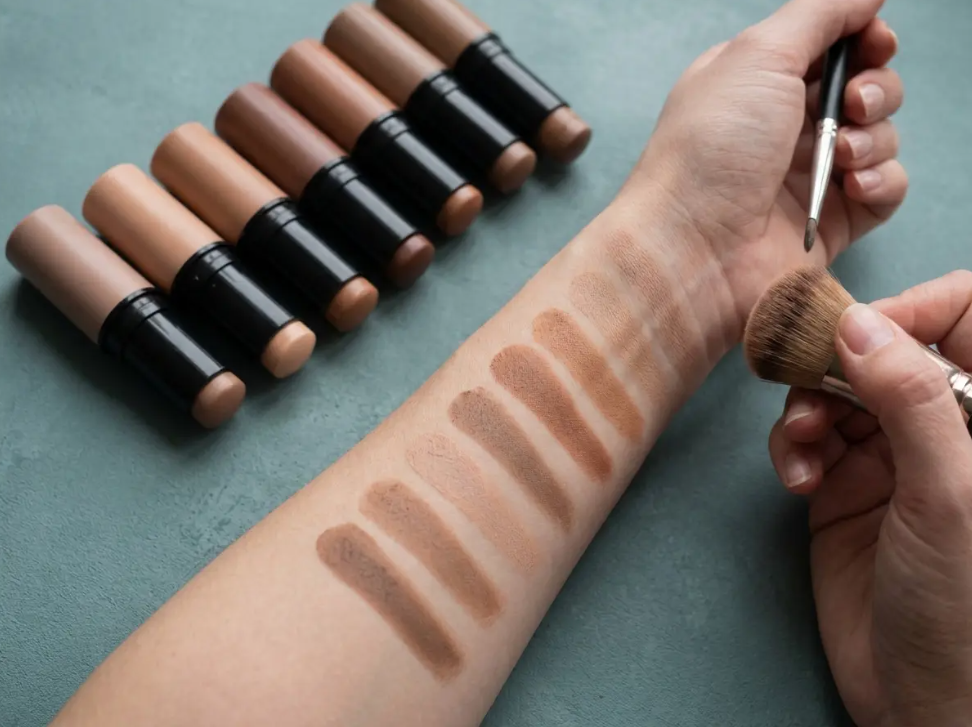
Finding the correct color match determines the success of your entire makeup contouring application and overall facial harmony. You must identify your skin’s natural undertone before purchasing the best contour stick from any major cosmetics retailer. Skin undertones generally fall into three primary categories: cool, warm, and neutral, which dictate how pigments appear on you.
Cool undertones pair best with contour products that have distinct gray or taupe pigments to mimic natural shadows. Warm skin tones require a contour stick with slight golden hues to prevent a muddy or ashy appearance. Neutral skin tones offer more flexibility, allowing for a balance of cool and warm pigments depending on desired intensity.
Depth of color represents another crucial factor in selecting the right contour stick shades for your specific complexion. A contour stick should generally be two to three shades darker than your natural foundation match for effective sculpting. Choosing a product that is excessively dark creates blending difficulties and leaves harsh lines that are difficult to diffuse.
Always swatch a contour stick along your jawline rather than the back of your hand. The skin on your face often has a different undertone and depth than your extremities.
Evaluating Cream Contour Stick Formula Textures
Texture plays a significant role in how a cream contour stick performs on various skin types throughout the day. Individuals with dry skin benefit from emollient-rich formulas containing hydrating ingredients like shea butter or botanical oils. These creamy textures glide over dry patches effortlessly without emphasizing flaking or uneven skin texture during long-term wear.
Oily skin types require a best contour stick that dries down to a natural matte finish to prevent sliding. Formulas with oil-absorbing properties prevent the product from moving across the face during humid conditions or high-activity periods. Many modern brands incorporate advanced polymers that help cream products lock onto the skin for extended longevity and durability.
You should also consider the finish of your foundation when selecting a face sculpting product for your routine. Mixing a highly emollient contour stick with a water-based matte foundation often causes separation or a patchy appearance. Matching the base properties of your foundation and contour guarantees smooth blending and a professional, cohesive makeup result.
How to Use Contour Stick: Application Like a Professional
Prepare Your Base Makeup
Apply your liquid foundation and concealer before touching your cream contour stick. Cream products blend much more seamlessly over a wet or tacky base.
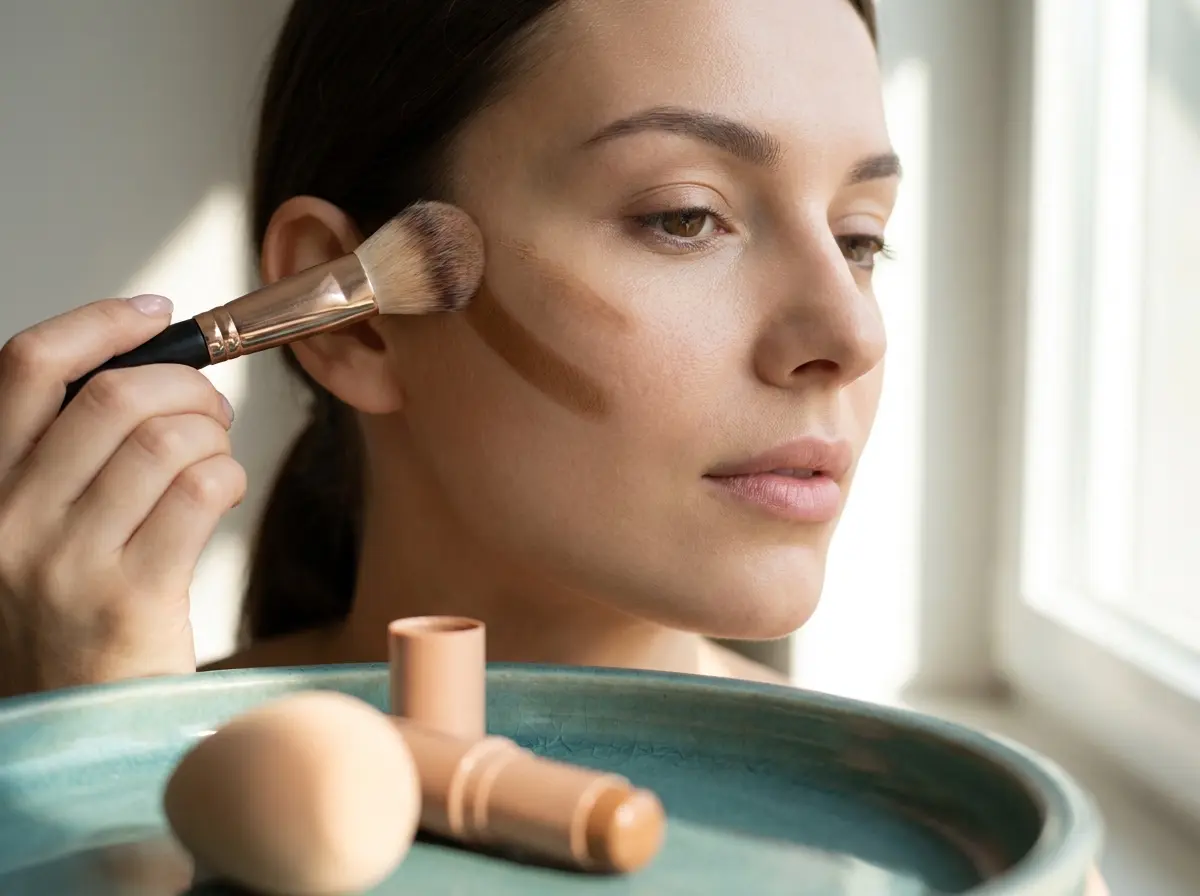
Map the Facial Structure
Draw precise lines under your cheekbones, along the jawline, and at the top of the forehead. Keep the lines thin to avoid applying excessive amounts of pigment.
Diffused Blending
Use a dense synthetic brush or a damp sponge to blend the product upward. Never drag the pigment downward, as this pulls down the facial features visually.
Blending Contour Stick: Techniques for a Natural Finish
The application method matters just as much as the best contour stick you choose for your makeup kit. Many professionals recommend using a dense, angled synthetic brush to diffuse the cream pigment into the skin seamlessly. Synthetic bristles do not absorb excessive amounts of product, allowing for maximum color payoff and control during the process.
Damp makeup sponges offer another popular method for blending contour to achieve a soft, airbrushed appearance on the face. The moisture in the sponge sheers out the pigment, creating a softer and more diffused shadow that looks natural. You should press and bounce the sponge over the contour lines rather than dragging it across your foundation.
Upward blending contour remains a critical rule for lifting the facial features and creating a youthful, sculpted appearance. Pulling the dark pigment downward makes the face appear sagging and heavy, which defeats the purpose of contouring. Always blend cheek contour up toward the temples and jawline contour down into the neck for a seamless transition.
Do not apply setting powder before using your cream contour stick. Applying cream makeup over dry powder creates a patchy, unblendable mess that ruins the base.
Cream Contour Stick: Comparing Cream Sticks to Traditional Powders
The beauty industry offers countless options for face sculpting, but cream sticks dominate the current market for ease. A cream contour stick provides a more natural, skin-like finish that melts directly into liquid foundations for seamlessness. Powders often sit on top of the skin, which can look dry or cakey under harsh lighting or photography.
Cream products allow for greater precision during the initial placement process, making them ideal for detailed work on the nose. You can draw exact lines down the bridge of the nose or accurately carve out cheekbones with minimal effort. Powders require careful brush work and carry the risk of pigment fallout onto your under-eye area or cheeks.
However, powders generally offer longer wear times for individuals with excessively oily skin who struggle with product movement. Makeup artists frequently combine both mediums for events that require maximum longevity and high-definition results for the camera. They apply the cream contour stick first as a base and set it lightly with a matching powder.
- Synthetic brushes and damp sponges provide the best tools for blending cream contour.
- Always blend cheek contour upward to create a lifted facial appearance.
- Cream sticks offer more precision and a more natural finish than traditional powders.
How to Use Contour Stick: Correcting Common Application Mistakes
Even experienced makeup enthusiasts make errors when learning how to use contour stick products for the first time. How do you fix a contour application that looks too heavy or muddy on the skin? You can easily correct harsh lines by bouncing your foundation sponge over the edges to sheer the pigment out.
One frequent mistake involves placing the cheek contour too low on the face, near the mouth area. This low placement drags the features downward, creating an aged appearance rather than a lifted, youthful look. You should place the cream contour stick slightly above the natural hollow of the cheekbone for maximum lift.
Failing to blend the product into the hairline creates a stark, unnatural boundary on the forehead that looks like a mask. The contour should melt seamlessly into the roots of the hair to mimic a natural shadow from the light. Taking an extra minute to buff the edges with a clean brush resolves this common issue effectively.
Makeup Contouring: Integrating the Best Contour Stick with Other Products
Building a cohesive makeup look requires understanding how different cosmetic mediums interact on the surface of the skin. A cream contour stick performs optimally when layered correctly with blush, highlighter, and a high-quality setting spray. You should apply your cream contour before any powder color cosmetics to maintain a natural, skin-like finish.
Cream blush pairs beautifully with a contour stick to create a seamless, gradient effect on the cheeks. You should place the blush directly above the contour line, allowing the two creams to melt together for a flush. This makeup contouring technique produces a soft, diffused transition rather than harsh, separated stripes of color on the face.
Liquid illuminators and highlighters further enhance the optical illusion created by your face sculpting products during the application. While the contour stick absorbs light to create depth, the highlighter reflects light to bring features forward. Placing a liquid highlighter on the high points of the cheekbones maximizes the sculpting effect completely for a professional finish.
Contour Stick Shades: Formulations and Ingredient Considerations
Consumers increasingly demand transparency regarding the ingredients used in their daily cosmetics and face sculpting tools. A high-quality cream contour stick often contains skin-conditioning agents that improve the epidermis over time with regular use. Ingredients like jojoba oil and vitamin E provide antioxidant protection while improving the glide of the product.
Clean beauty standards have forced manufacturers to rethink their preservation systems and pigment sources for modern consumers. Many brands now avoid parabens, phthalates, and synthetic fragrances that might irritate sensitive skin or cause breakouts. The Environmental Working Group provides excellent resources for checking cosmetic ingredient safety profiles before you purchase.
Silicone-based ingredients frequently appear in cream contour formulas to provide a blurring effect on the skin’s surface. Dimethicone and similar compounds fill in fine lines, creating a flawless canvas for the pigment to sit upon. According to the American Academy of Dermatology, non-comedogenic formulas help prevent breakouts for acne-prone individuals using cream makeup.
Conclusion: Mastering Your Contour Stick
Mastering the use of a cream contour stick transforms your standard makeup routine into a professional-level application with ease. Understanding facial anatomy and selecting the correct contour stick shades provides the foundation for successful facial sculpting. You can create the illusion of sharper cheekbones and a more defined jawline rapidly with practice.
The beauty market continues to innovate, offering formulas that blend effortlessly and last all day on various skin types. By choosing the best contour stick that matches your skin type, you guarantee a flawless and natural result. Practice your blending contour techniques regularly to discover the exact placement that flatters your unique face shape.
A cream contour stick remains a versatile and powerful tool in any modern cosmetic collection for daily use. Whether you prefer a subtle daytime shadow or dramatic evening definition, this product delivers reliable and beautiful results. Take the time to evaluate your needs, experiment with different tools, and elevate your makeup contouring skills today.

